In 2012, I decided to climb a mountain. I had this thing, back then, where I forced myself to do something physically demanding, every year, just to prove that I hadn’t drifted too far from “in-shape”. In 2011, it was a half marathon. 2013, Tough Mudder. I don’t have an annual punishment anymore, but I did climb a mountain in 2012.
The mountain I am referring to is South Sister and is the third tallest peak (10,358 ft.) in Oregon, behind Mount Hood (11,250 ft) and Mount Jefferson (10,496 ft.). South Sister is one of three mountains, geographically stacked next to each other and the three are called the Three Sisters.
Bend, Oregon
I’ll give you the logistics, to get that out of the way. South Sister is about 35 miles west from Bend, Oregon, which is about 166 miles, southeast of Portland, Oregon. Bend is a cool town. Although it has a population of about 100,000 people, Bend feels like a cozy little outdoor town.
Great food, lots to do and definitely no shortage of wineries and microbreweries. The Deschutes Brewery is downtown Bend, which was a memorable first stop for us. You can’t undervalue good wings and great beer, after a long day of travel.
Bend seems to offer everything an outdoorsman would want. The Deschutes River flows right through town, offering stand up paddle boarding, kayaking, white water rafting, fly fishing and just about every water activity you could imagine.
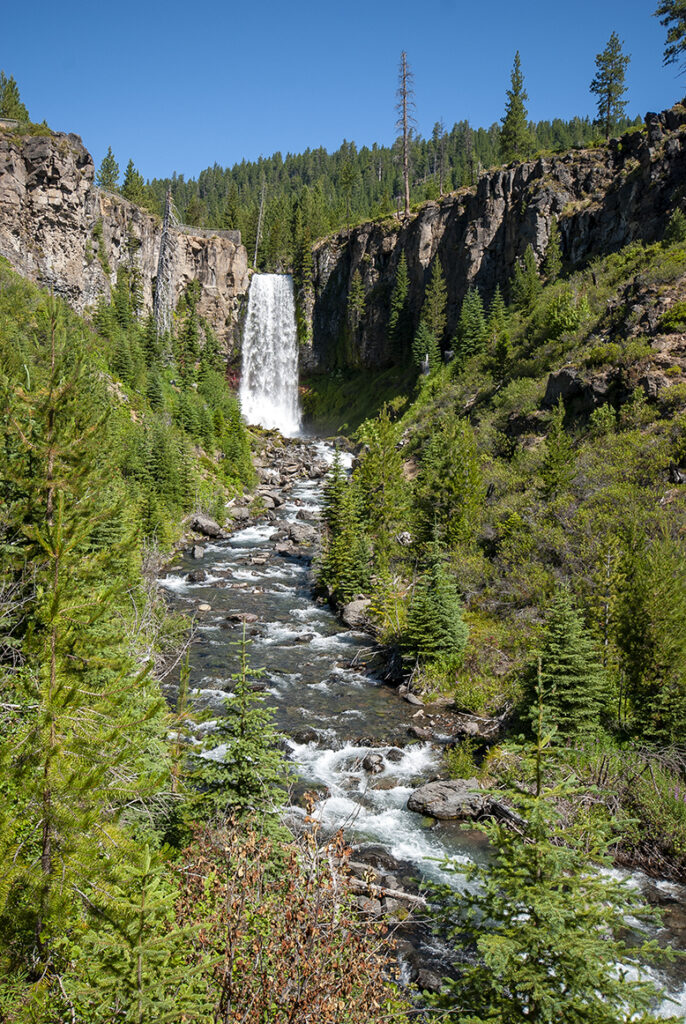
Within a short drive, you have Tumalo Falls and Pilot Butte, both amazing for hiking and sight-seeing. There is no shortage of bike trails either. All in, Bend seems to offer everything, from drinks and live music to endless outdoor activities. I could fill an entire series of blog posts on the city of Bend but we’re here to talk mountain climbing, so let’s get back to that.
Prep and Pre-Trip
I think it goes without saying that you have to be in shape to climb a mountain. Well, if it goes without saying, why say it? Because I wasn’t really in shape. I figured I’d wing it. Sure, I did some training but not enough and nothing too intentional.
In NE Wisconsin, there is a park named High Cliff. It’s a great state park and offers options for hiking, biking, horseback riding and camping. The nice thing about High Cliff is the elevation change. For Wisconsin, the elevation really is pretty good for building endurance and leg muscles for activities that require climbing.
At the time of the South Sister climb, I was at High Cliff three to six times per month, trail running, mountain biking or just hiking the trails. For training purposes, I should have been there three to six times per week and for a longer duration than I was there.
Look at it this way, you are going to be going up for six miles straight. Imagine a six-mile staircase… that is made of loose rock (scree, we’ll get to that). A stair master would have been a good option. Just get in shape. Be light (lose weight) and build a whole lot of strength in those hamstrings, quads, glutes and calves.
Gear
We didn’t need much for gear, but the gear that is needed, is really needed:
- Boots: Have good, comfortable boots and fit right. Remember, that the way down is all toes pushing on the fronts of boots. You can either get good boots or lose a toenail, your choice. I bought ASOLO TPS 520 GV. No lost toenails and they are quite comfortable so good stuff. For this trip, there was snow and some small streams to get through so waterproof is important.
- Clothes: Pretty basic. I wore convertible pants (bottoms zip off) because I knew that we would be dealing with alternating temperatures. Sometimes 30 degrees, sometimes 65 degrees, and climbing for hours straight. Convertible pants gave me options. Similar to boots, good socks are a must. I had Smartwool medium hiking socks. A technical t-shirt and thin, wool top layer filled out the wardrobe. I may have had a hat also… some of this stuff is preference.
- Hiking Poles: You don’t really realize why things are important, until you are in the situation where you need them. Poles were important. I can’t imagine that you need anything high end. I have Black Diamond Contour Elliptic.
- Backpack: Again, nothing fancy needed. I had a Jansport Odyssey 39, which has a pocket for a Camelbak 64 oz. bladder. Whatever pack you bring, make sure it’s light, holds plenty of water and snacks and has comfortable shoulder straps.
- Gaiters: Gaiters are for the scree and the snow. They cover the gap between your boots and pants so little rocks, snow or other unwanted invaders don’t get into your boots. I have Mountain Hardware Nut Shell Gaiters. Again, nothing fancy needed but get gaiters.
- Water/Snacks: Bring a lot of water. Had a 64 oz. Camelbak bladder and it was about half as much as I needed. Having enough water is worth the weight. Snacks are important also. You’re burning a lot of energy and it’s important to refuel along the way. I like Clif Bars, amongst others.
- Costs: Obviously your costs may vary, depending on your overall trip plan but there is a $5 charge to park at the Devil’s Lake Trailhead.
Getting There
We flew in on August 1st, with plans to climb on August 2nd. That was not a good plan. Part of planning is planning for the altitude change. Less than 24 hours is not enough time to acclimate.
I could feel the altitude change when we were driving to Bend. Coming from about 750 feet of elevation in Northeast Wisconsin, to 50 feet in Portland, no sweat.
Going from Portland to Bend, we gained about 3,500 feet. Still not bad but I felt it. Perhaps that was just nerves. Either way, I felt something and should have taken a couple days to acclimate.
We assumed about six to eight hours and anticipated temperatures going up in the afternoon, so we planned to leave around 4:00 AM, so we would be on the trail by 5:00 AM. The alarm sounded at 3:00 AM and we were all wide awake.
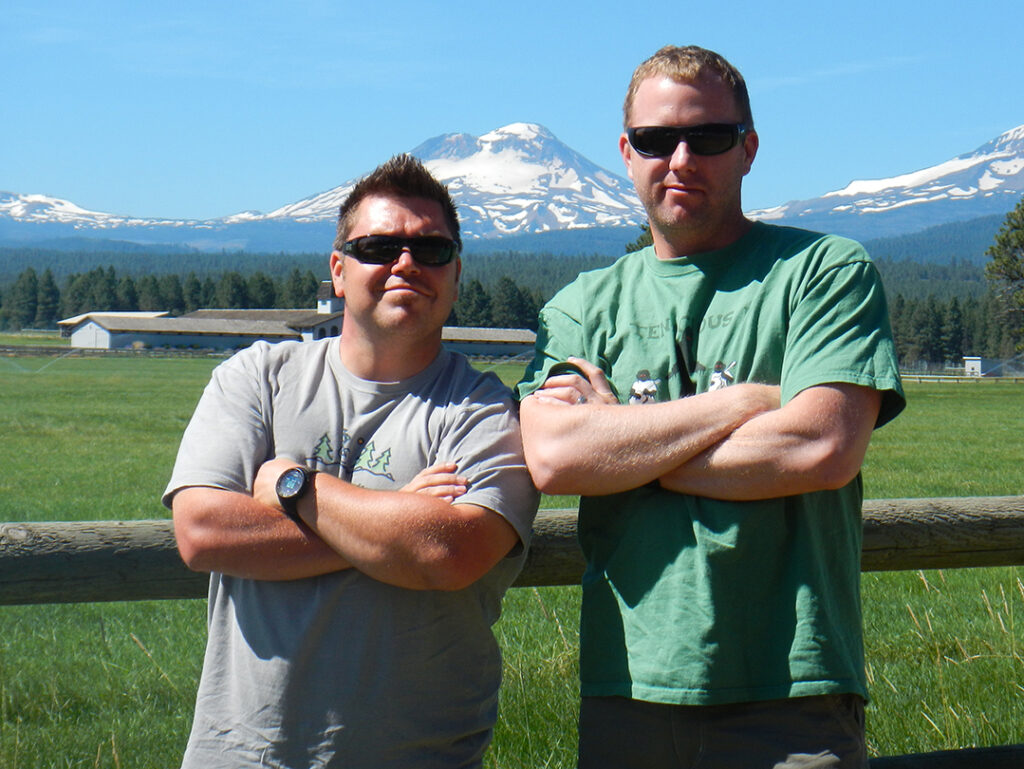
My climbing partner was my buddy, Andy. Andy and I did the Tough Mudder together also and he is an amazingly patient, fit, decent guy. Our wives were with us for the trip but were not coming along for the climb. At 3:00 AM, all four of us were up and planning to have a quick breakfast.
I don’t know if the excitement for the day got me or fear that a big breakfast would lead to stomach issues, but I decided to only have a banana and a slice of toast, with peanut butter, for breakfast. That was a mistake. Eat something… You need fuel. Eat.
The Climb (Stage One)
The Devil’s Lake Trailhead is about 35 miles west of Bend and sits at about 5,500 feet of elevation. The half hour (or so) drive there at 4:30 AM seemed to go very fast. Once parked, we were off. No chit-chat or time to second guess the decisions made. Park, gear up and away we go.
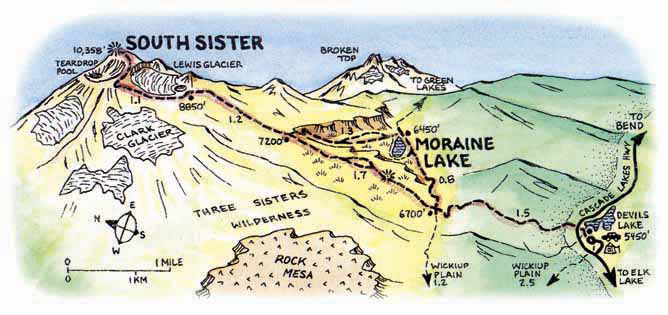
I recall five stages to the climb. The first stage was Hemlock forest. This is a mile and a half of steep, wooded trails and provides the initial shock for out of shape you are. This stage is relatively viewless and uneventful, other than the 1,200 feet of elevation gained in a mile and a half.
Stage Two
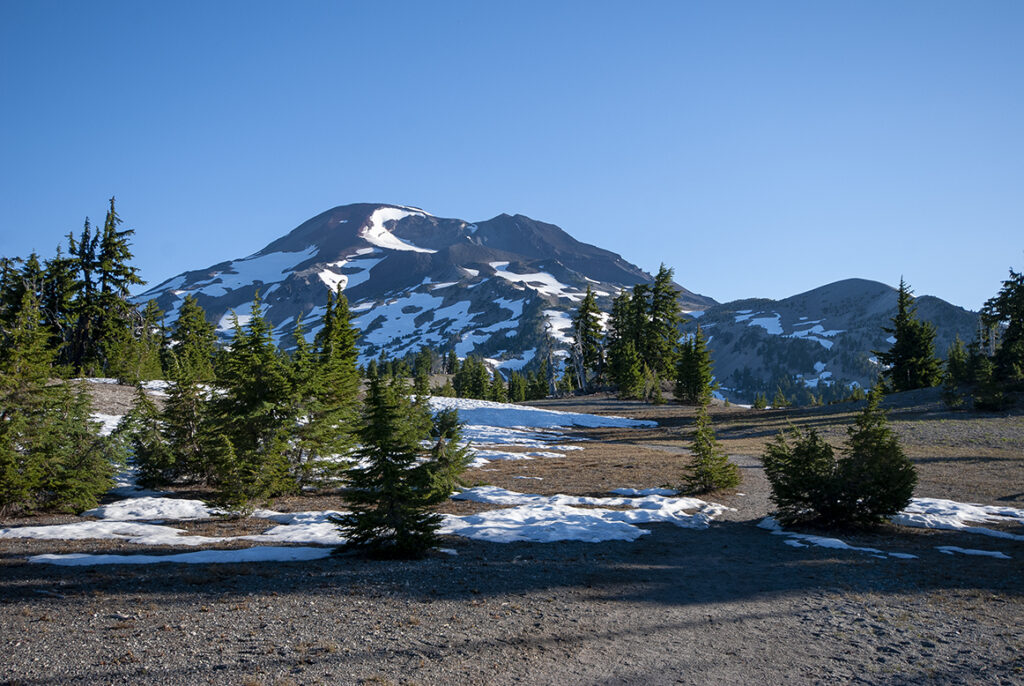
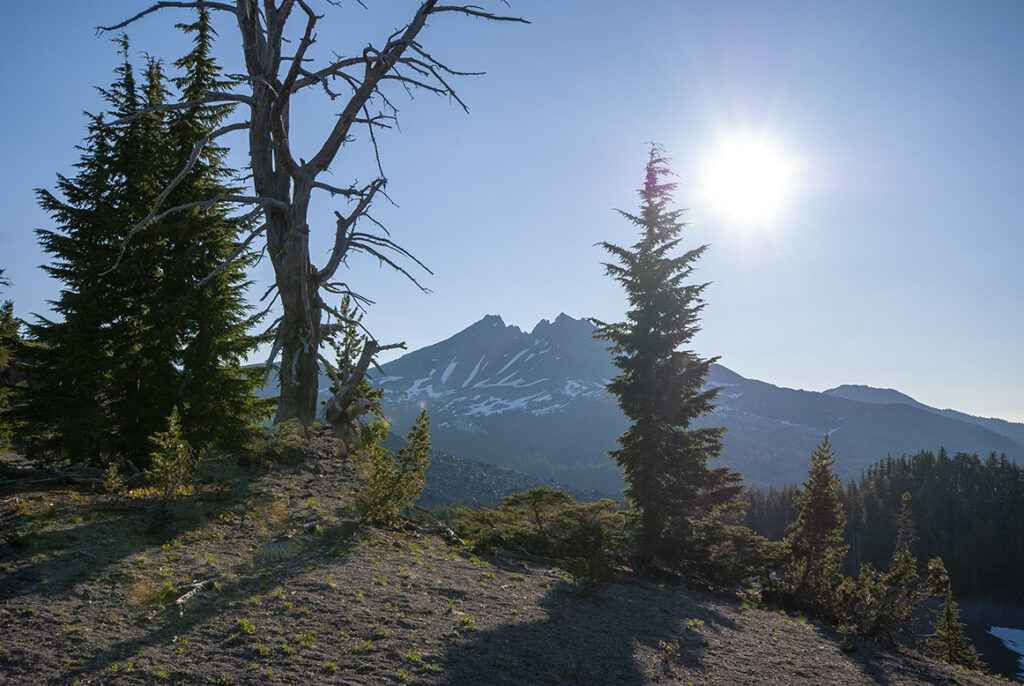
Stage two (approx.. 6,700 ft.) is when you get your first look at the mountain. You come out of the forest, to a sandy plateau that lasts about another mile. Have a camera ready here. You get great views of mountains, including Broken Top, Mount Bachelor and South Sister. About a dozen mountain lakes, wind-gnarled trees and other terrain fill out the overall attractive landscape toward Moraine Lake and the South Sister mountain base.
Stage Three
Stage three is at the mountain and the upper area of the Moraine Lake valley and is about 7,200 feet in elevation. At this stage, we start climbing the mountain. There really isn’t any technical climbing needed. Sure, there are some areas, along stage three, where you can incorporate some technical climbing, and we did, but it is really just a steep trail, with ever increasing scree.
Scree /skrē/ (Noun): a mass of small loose stones that form or cover a slope on a mountain.
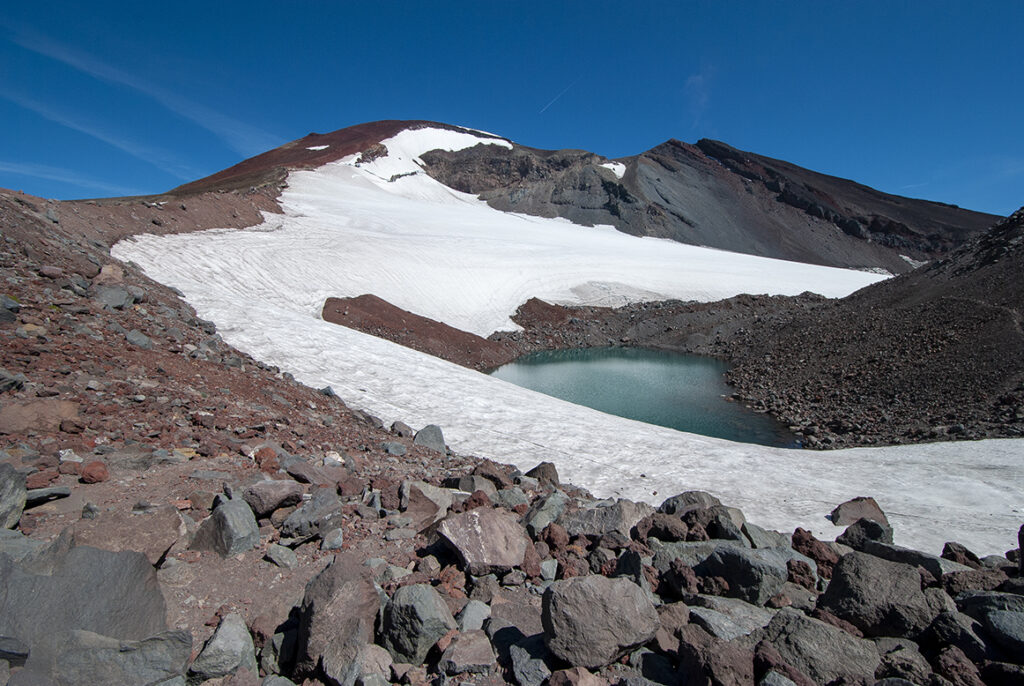
Stage three is about a mile and a quarter and is exercise in over confidence. It looks like you are much closer to the top, than you are, and the scenery is enough to keep spirits high. By the time you reach Teardrop Pool, a small green lake at South Sister’s false summit, you feel like 100 dollars, but you are only 8,850 feet up and you still have about a mile and 1,500 feet of elevation to go.
Stage Four
Stage four is tough. Scree, altitude and the steep incline will get the best of anyone, and that’s assuming you are in good shape and the weather is perfect. We had one and a half of those things. Andy was in good shape (I was not; that’s the half) and the weather was absolutely perfect. 60-65 degrees and almost no clouds. It was a great day to be outside.
Once we started up stage 4, I was virtually out of water. Andy was also. It didn’t look like we had far to go so we weren’t too concerned. Of course, we are looking at the top of the mountain as the end of the journey, when we still had the entire trip back to contend with. At that point, the journey back was out of sight, out of mind and we were focused on reaching the summit.
The scree was now the only thing we were climbing. For each step forward, the scree took you a half step back. The remaining three-quarters of a mile seemed to get longer and longer. Adding to this was the elevation.
At about 8,000 feet, you can really feel it. Your lungs start to tighten up and it feels like each breath is only taking in about a quarter of the air you expect. Climbing was slow for stage four. It took about three hours to get the five and a half miles to stage four, and 2 hours to complete the three-quarter climb of stage 4.
Other Climbers
A group of tween girl scouts passed us up, giggling and happily hiking along, as though walking down the street. I am going to assume they were local and had done this before, as they were not accompanied by any adults or older chaperones. Nothing makes you feel old and fat like a bunch of little girls laughing and skipping by as you fight for your life, on a grueling uphill climb.
Somewhere around 30 feet from the lip of South Sister’s crater, the lack of water and altitude caught up to me. I cramped up like nothing I have ever felt, and I was stopped dead in my tracks. It had been a long day and the mountain needed to give me one last reminder to plan better next time. As my body seized up, I dropped to my knees and grabbed hold of a boulder, to keep from falling backward.
For the next 20 minutes, I basically questioned every decision that I ever made and contemplated calling my wife to rent a helicopter to come get me.
That was it, I was done for. What the hell was I doing, climbing a mountain. What kind of a moron… Just then an older gentleman wandered up and asked if I was alright. I kind of laughed at myself and explained the issues with altitude and running out of water. Without skipping a beat, he reached into his backpack and pulled out a bottle of water. “Here you go”, he said casually.
How awesome was that? Somewhere between the water and that old guys act of kindness; I was on my feet and ready to summit this sumbitch. Andy asked if I wanted to turn back, clearly seeing the physical tole that I was, in no way prepared to complete. Hell no. We took it slow and reached the crater lip. On to stage five.
Stage Five
Stage five is basically the snow-filled crater of the volcano. While I have referred to South Sister as a mountain, up to this point, it is, in fact, a volcano. It last erupted over 2,000 years ago, so we didn’t have a lot to worry about, but it is worth mentioning.
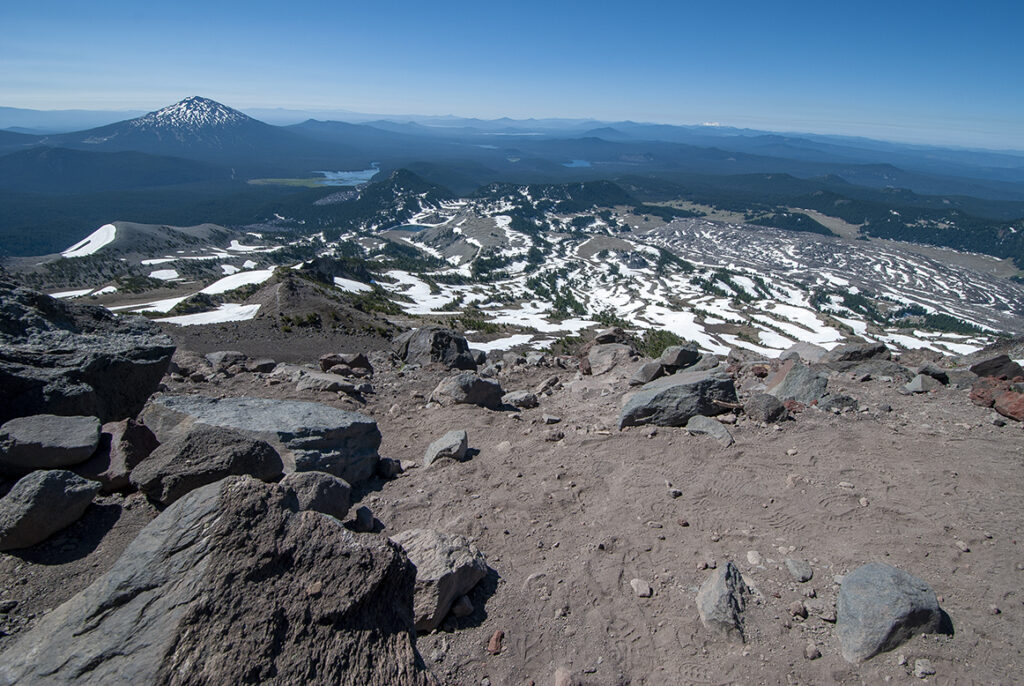
The crater, as I mentioned is filled with a glacier and, although it would appear that you can walk across the top, we weren’t about to try. Neither was anyone else up there and there were many people (40-ish) on the crater. The crater took about 30 minutes to walk around and we were at the summit. There was a marker, providing the proof and vindication we needed and the views from the top were breathtaking.

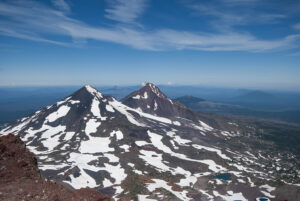
From the South Sister summit, there was a clear line, where we could see Middle and North Sister Mountains, as well as Mount Washington, Mount Jefferson, Mount Hood. To the East, we could see Broken Top and Mount Bachelor. The views were nothing short of amazing, but we still had the trip back down to contend with and it had already taken about 6 hours for us to climb the 5,000 of elevation, over about six miles.
The Return
The return is a much shorter story. For me, the trip down was great. My trekking poles really earned their keep, in helping me keep balance. The only couple things that come to mind are:
Take it slow. I got a little excited and started blasting down the scree. This ended in me falling backward onto a rock and having a bruised purple buttcheek (yes, the whole buttcheek) for a few weeks following. Had I fallen a couple inches to the right, it would have been my tailbone. Imagine that decent… that was lucky.
We saw some people basically book skiing down the side of the mountain. Man, they got down quick. Either those dudes were morons, skilled in the art of boot-ski decents or just had much bigger balls than us. Either way, we chose to hike our way down. Which brings me to thing 2.
Have good boots/shoes. I mentioned this earlier, but I think Andy’s lost toenail would back me up on this. Good boots are important throughout but, on the way down, your feet are pushing up against the front of your boots. If they don’t fit just right, it’s painful.
All in, the climb and decent took about ten hours. More than we planned but totally worth it. If I am given to opportunity to do it again, I will. But this time I am going to be in great shape, I am going to give myself a couple days to acclimate to the altitude, I am going to eat a big-ass breakfast and I am going to bring, at least, 100 ounces of water. Maybe I’ll meet that old guy, up top again, and I can return the favor.
Thirsty for more? You can hear the story on The Border Outdoors Podcast, episode embedded below.
Subscribe to The Border Outdoors Podcast on Apple Podcasts and Spotify.
Follow Border Outdoors on these Social Media Platforms